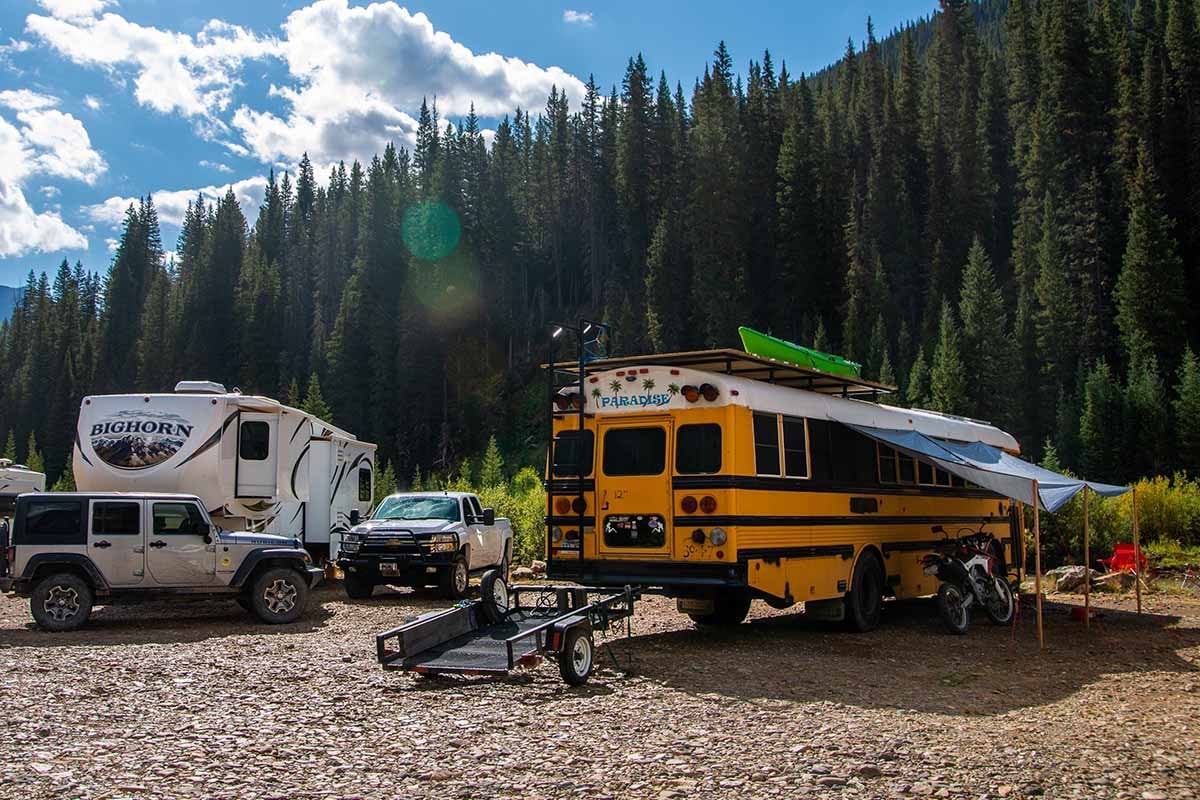
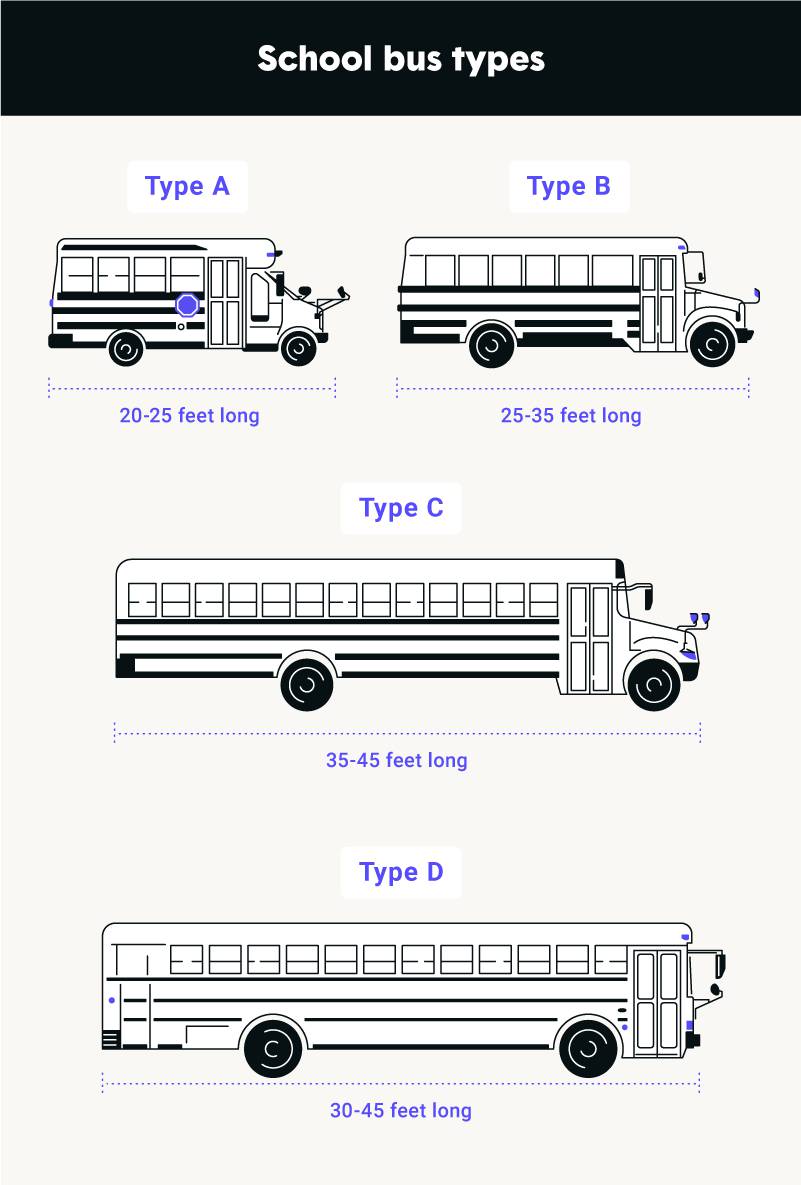
To decide between these types of buses, consider how much space you’ll require and how comfortable you are driving a large vehicle.
2. Find a school bus to convert
If you’ve narrowed down which type of bus you’re interested in, you might be wondering where you can even get a bus. They aren’t something you usually see on a car dealership lot.
The best place to start is online. There are many websites and classifieds where sellers post their used buses for sale. A few options are:
- Public Surplus [7]
- Bus Life Adventure [8]
- GovDeals [9]
- Northwest Bus Sales [10]
- Craigslist
- Facebook Marketplace or Groups
While you could buy new, it’s more cost-efficient to buy used. This is because buses are built to last up to several hundred thousand miles, and newer buses cost over $100,000. Plus, you’ll be gutting the inside, so it doesn’t matter if the inside seats and floors are in good condition. When looking at buses, make sure to test drive and look it over as you normally would when purchasing a vehicle.
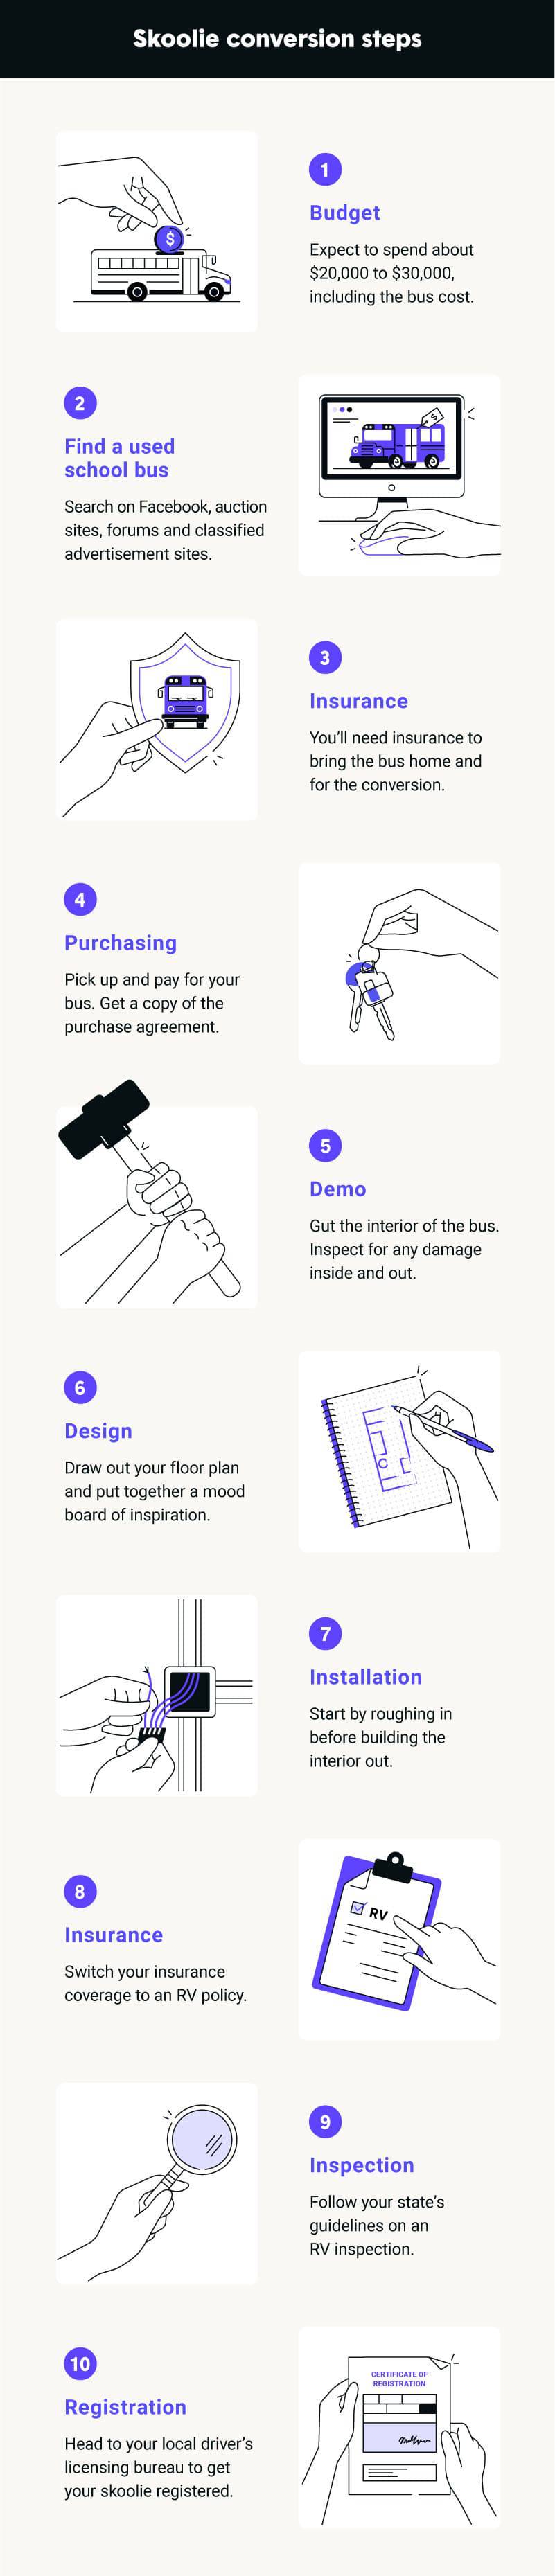
3. Prep and gut your school bus
Now the fun part officially begins — demo, design, and seeing your vision come to life. Demolition (or "demo") is the process of gutting the interior of the bus. In this stage, you’ll remove everything down to the studs (or basic frame of the bus). Say goodbye to the seats, original floors and walls. You’ll need to tear everything out until you see the inside of the walls.
At this point, you’ll also be looking for any damage you may need to repair, like rust, broken windows, frame wear or leaks. Take note and fix any obvious signs of damage.
Before moving on to building out the interior floor plan, inspect the exterior as well to ensure everything is in working order. Replace any lights and signage and freshen seals as needed. Also, consider what your rooftop will require.
For example, you’ll need several solar panels if you plan on mostly boondocking. If you can’t stand the yellow of the bus, you can paint the exterior too, though that’s not something you need to do immediately.
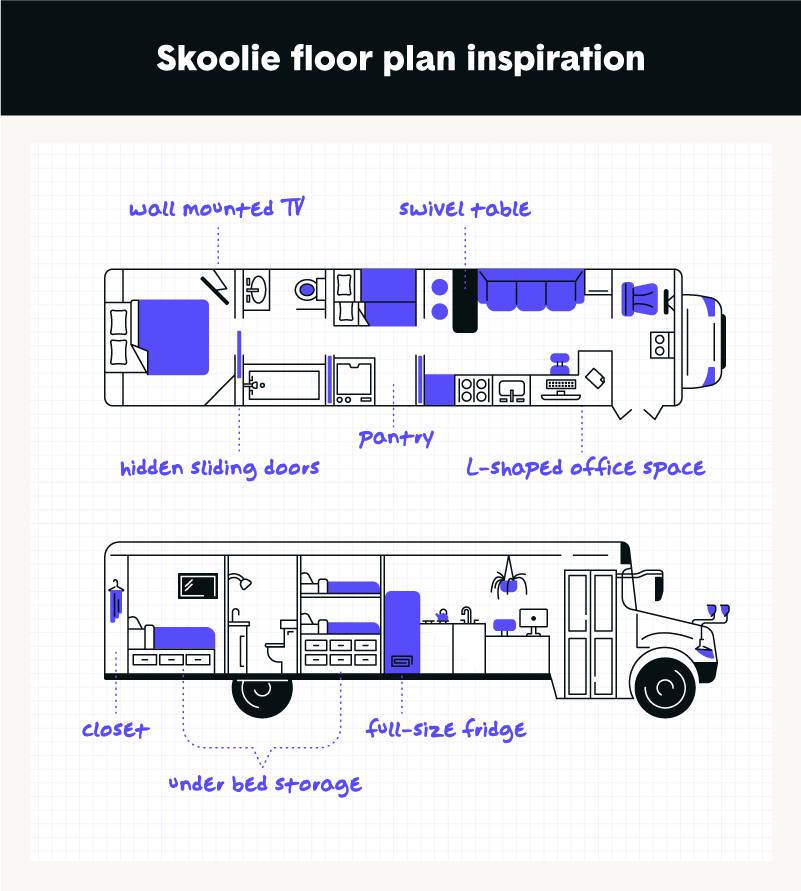
4. Pick a skoolie floor plan
At this point, you probably already have a good idea of how you want your new home on wheels laid out. And if not, now is the time to start. You don’t want to start laying down subfloors and putting in the wall and ceiling installation until you have your floor plan figured out, as you’ll need to run wiring and pipes throughout.
The standard floor plan is a bedroom in the back, a bathroom in the middle and a combined kitchen and living area in the front. However, you could build the bathroom or maybe a workstation in the back. Choose a layout that fits your needs. For example, if you’re not the type to lounge around indoors, you might not need a living area with a couch at all.[11]